Today was the due date for my advanced baking themed cupcakes, and of course mine were Alice in Wonderland themed! I am so happy with the turnout!

I started off with some Earl Gray muffins that I had previously made and stored! These were chilled to make them easier to decorate. The recipe for these yummy muffins are in my previous advanced baking post, so check it out!

Holly and I whipped up some fresh buttercream this morning using my personal buttercream recipe:
Vanilla Buttercream:
Ingredients:
- 2 cups butter, room temperature
- 2 cups vegetable shortening
- 2 tsp vanilla, or more TT
- 4 lbs sifted powdered sugar
- Water for thinning
Directions:
- In a stand mixer fitted with a paddle attachment, beat butter until fluffy and lighter in color. About three minutes for room temperature butter. Scrape down sides and bottom of bowl at least twice. (Make sure your butter is room temp for a smoother buttercream. If it is cold butter, beat a bit longer.)
- Add shortening and mix for another three minutes, scraping down the sides at least twice.
- Add vanilla and mix until incorporated.
- Add powdered sugar a couple cups at a time. Mix until incorporated before adding more sugar.
- If buttercream becomes too stiff for mixer, add some water, a tbsp at a time and then continue adding powdered sugar.
- Thin buttercream as desired with additional water.
** vanilla extract can be replaced with any other kind of extract if desired or left out altogether.
After making a double batch of buttercream with Holly, I got down to business decorating! The first thing I did was pipe a little buttercream into the bottoms of my cute, mismatched teacups and place a muffin inside each one.
I got these all from the Palmer Home thrift shop for about 25 cents each!

My first cupcake to construct was the Mad Hatter.

The first thing I did was select the perfect teacup and saucer for the hatter. I liked the taller, skinnier cup which seemed to suit his unique “personality”.
I piped a mound of pale, rose pink buttercream on top of the muffin using a Wilton 1M tip. Like this:

Earlier in the week, I had made some hair for the hatter! This hair s made out of orange colored fondant that I rolled into skinny logs and wrapped around toothpicks! I made them plenty in advance so that they would have time to harden up and hold their curly shape.
I chose to make tight curls and loose ones to give a more “untamed” hair look!

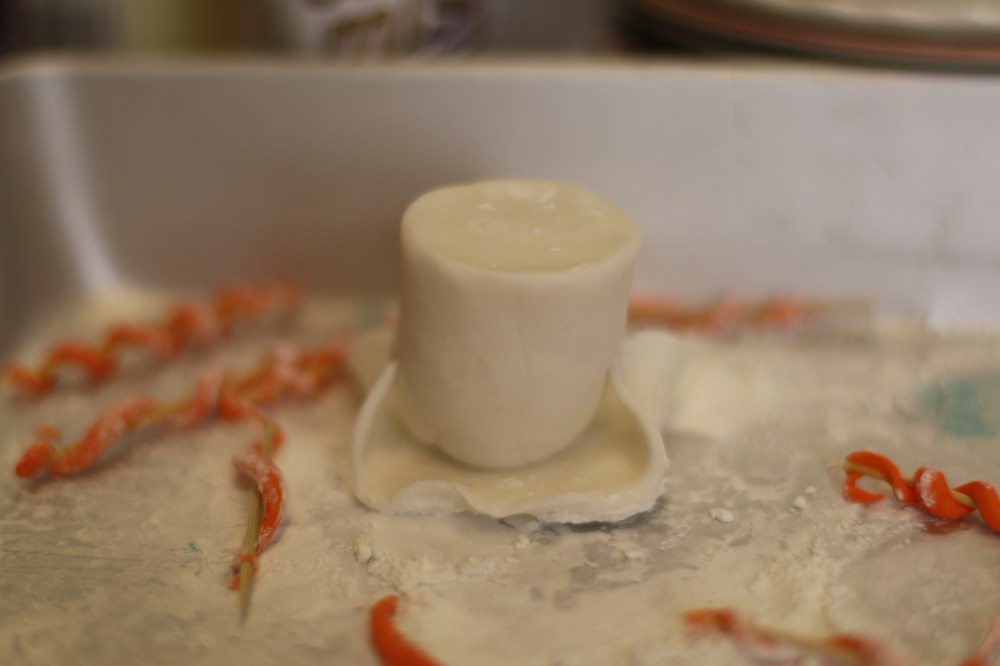
I had also mad an uncolored version of the Mad Hatter’s hat earlier in the week and set it aside to harden up! It is made out of two pieces – a fat cylinder shape for the crown, or top part, of the hat and a thinly rolled oval piece of fondant to make the brim. I attached the two pieces with a little bit of water to act as glue, and I curled the brim up and connected it to the hat on two sides with a little more water.
Then, I mixed a drop of green food coloring with the tinniest bit of copper food coloring and some pure lemon extract to make an almost dirty looking green “paint” color for his hat. Using a regular paint brush I painted the hat aiming for a distressed look by painting some areas more heavily than others and intentionally adding extra orange to certain spots, like the brim!
After the hat was painted, I set it aside to dry and colored a little bit of fondant pink to make the ribbon and bow on the front. I attached that with a little bit of water and then I added then little card in the hat!

I placed the hat on top of the mound of buttercream and one by one added the curly hairs after CAREFULLY removing them from the toothpicks! I broke several of these because they were so thin and fragile, but the different lengths make the hair look better and “madder” in my opinion!
This cupcake was all done, so I set it aside and began on Alice! For Alice, I used my other tall teacup because I thought that would look more “realistic” for her to be falling in to!
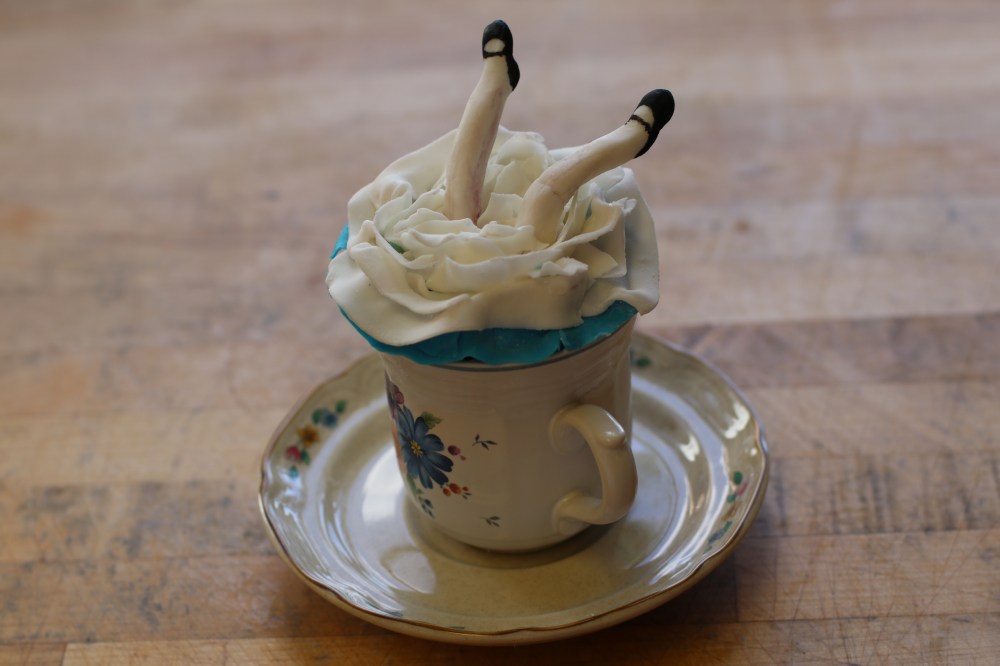
I did the same procedure with the buttercream for this cupcake, and then I placed Alice’s skirt into the top of the tea cup. I pushed it down so that the ruffles folded over the top of the teacup.
I had made Alice’s skirt in advance! To make the skirt, I colored some fondant a teal blue color and I also left some white. I rolled the fondant out fairly thin and then cut it into strips. I wrapped the blue strips around the inside of a regular sized muffin pan so that it would have something to help it keep its shape. I put a layer of blue fondant in the bottom to make a little skirt cup. I then filled the whole skirt up with thin strips of white fondant that I crinkled up to look like a ruffled underskirt.

Once the skirt was in the teacup, I added in some more fondant ruffles to fill in the empty spots.
Next, I painted Alice’s feet. I had made her legs in advance as well! These are so easy to make. I rolled out two logs that were the same thickness and length. I then pinched the ends to shape little round feet and pinched them again halfway up the legs to make knees. I bent one a little more than the other to give a more realistic falling position. Once I had them situated the way I liked, I put toothpicks in them and left them out to harden. I wanted these to be REALLY firm so that they could stand up with no additional support. These are best made plenty in advance.

Of course, if you don’t have time to make your decorations in advance, there is another way to get them to firm up quickly – Tylose powder. A little kneaded into your fondant will make it harden up really quick, but it is a little expensive. I like to make decorations in advance so that I don’t have to pay for Tylose!
Once her feet were dry, I pushed the toothpicks through the skirt and straight into the actual cupcake! All done with Alice!

“I’m late, I’m late, I’m late for a very important date!” That’s right, the White Rabbit is up next!

This may actually be my favorite of all six of these cupcakes! His little ears are just so cute, and I love the pocket watch!
I started out with the same buttercream technique in a brand new teacup. I then put together my pocket watch. I had already made the pieces separately:

The pocket watch was just a round shaped, flat piece of fondant. I made the chain with short little fondant logs that I linked together and glued with water! I glued the chain on with a little more water. The face of the clock was just a thin piece of fondant that I cut into a circle and wrote on with an edible marker.
I attached the watch face to the body with a little water and placed this all onto my cupcake. I then added a little extra chain that I had made.
I had shaped my ears out of thick pieces of uncolored, white fondant beforehand and attached toothpicks in the bottoms of them so that I could easily stick these through the buttercream and right into the actual cupcake. These went in next, followed by six very thin fondant whiskers!
I then decided to brush on a little of my leftover rose pink buttercream onto the inside of the rabbit ears to add a little bit of color and dimension.

Tweedledee and Tweedledum!
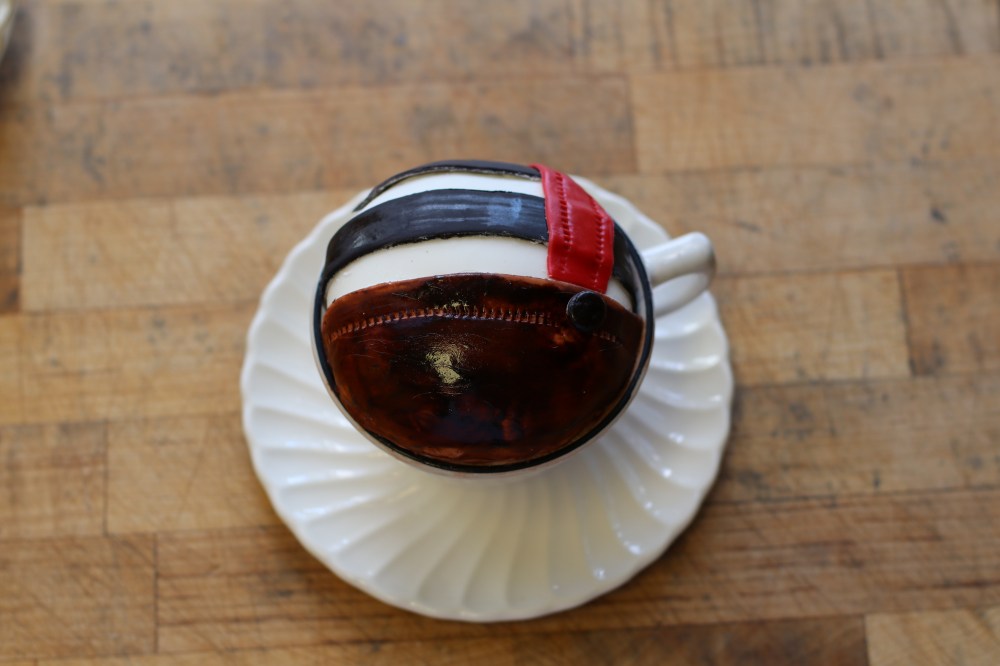
Yes, I did make twin cupcakes.

Or almost twins! There strips and suspender are reversed. 🙂
I piped the same mound of buttercream on top of these two muffins, but the next step is different! I cut a fairly large, round piece of white fondant…

and wrapped it around all of the buttercream and tucked it into the side of the teacup. This made a rounded belly look.
I then cut some strips of black fondant and attached two onto both Dee and Dum to make shirt stripes.
Next, I added another piece of white fondant to the very bottom of the cupcake and tucked it into the teacup as well. This portion I painted with a “paint” made of brown food coloring, a little bit of copper food coloring and lemon extract. I used a fondant tool to make the indentions in the pants, and then I attached strips of red fondant to make the suspenders. I used the same fondant tool to make the indentions in the suspenders. The little buttons were just round pieces of black fondant that I attached with water.

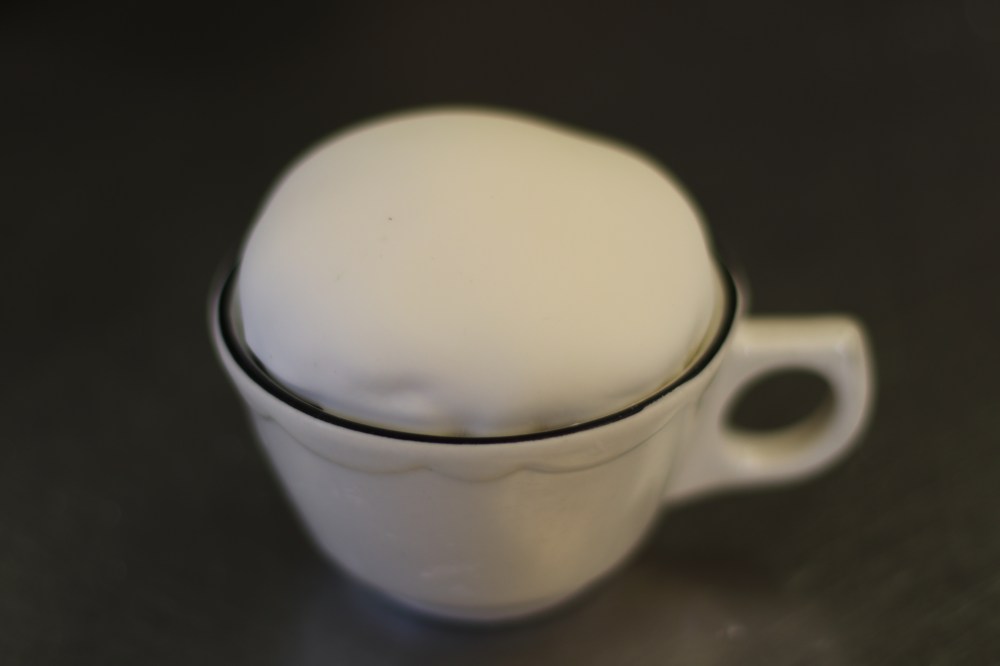
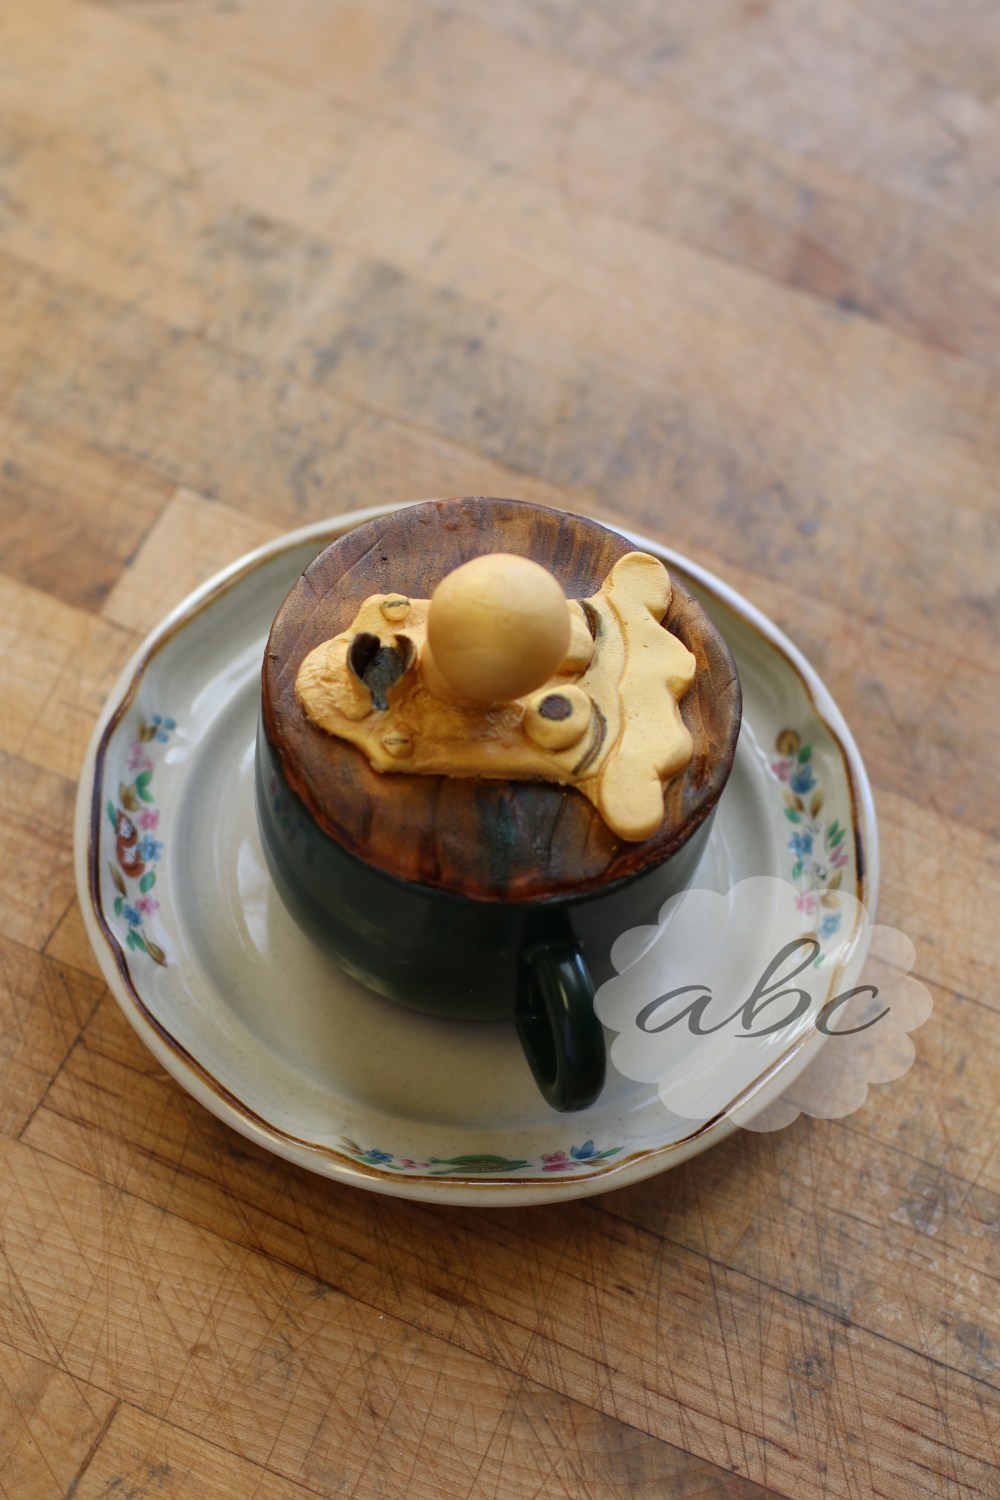
And last but not least, the doorknob!

This cupcake started off a little differently! I wanted the doorknob to be on a flat plaque, and Holly gave me the great suggestion of basically just having it lay right across the top of the cup. So I piped just enough inside to reach the top of the cup.
I then cut another round, white circle plaque for my wooden door:

I used a fondant tool to make random indentions in the fondant to try to replicate the texture of a wooden door. I then place the plaque right on top of the buttercream and tucked it in.

Using the same brown color mixture that I had used for Dee and Dum’s trousers, I painted the wooden plaque. I went back and added some darker brown for dimension as well.
I had made my doorknob in advance:

It was in two pieces – the face piece and the nose piece. I glued the face piece onto the plaque with a little water and then added the nose with a bit more water. I used some black food coloring to paint the inside of the doorknob’s mouth and make pupils and eyebrows. I then added a little gold luster dust mixed with lemon extract to give the whole thing a little extra shine and sparkle.
After today, I really cannot wait to get started on my Alice in Wonderland wedding cake! Next week we are working on Homecoming desserts which should be a “treat”! 😉
ABC.
