Today was MIDTERM DAY in Food Styling!
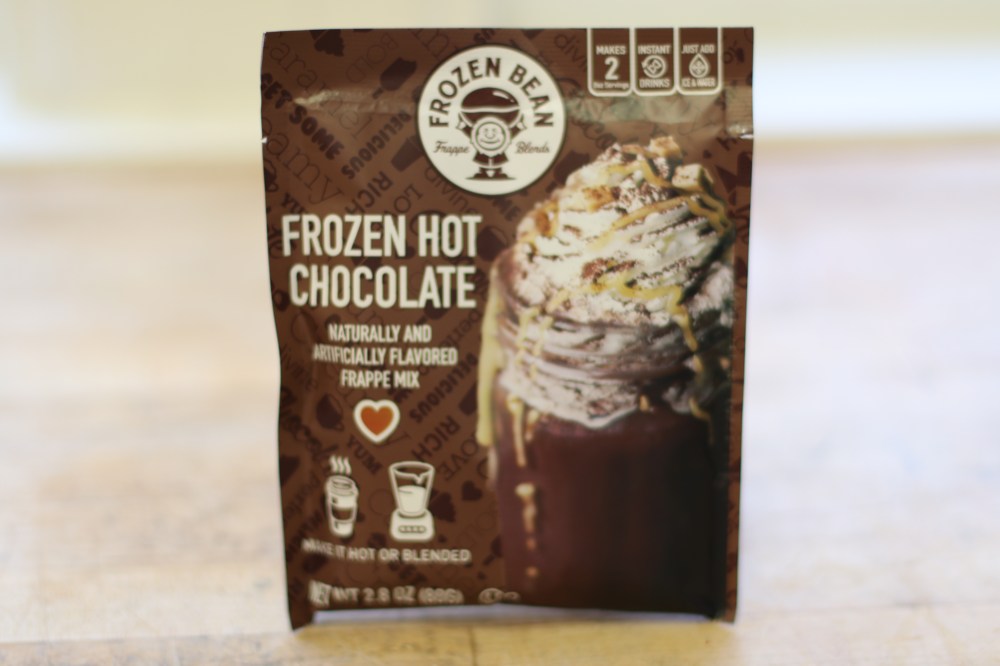
I arrived at 7:30 to get a head start on my midterm assignment (which was to recreate the photo on a packaged product). The product I chose was a hot chocolate mix in case you’ve forgotten since my last FS blog post!
Last class period we were given thirty minutes to collect our ingredients and I chose the following:
- 1 can of shaving cream
- Vanilla wax melts
- Almond Bark
- Chocolate Pudding Mix
- Cocoa Powder
- Hot Chocolate Mix
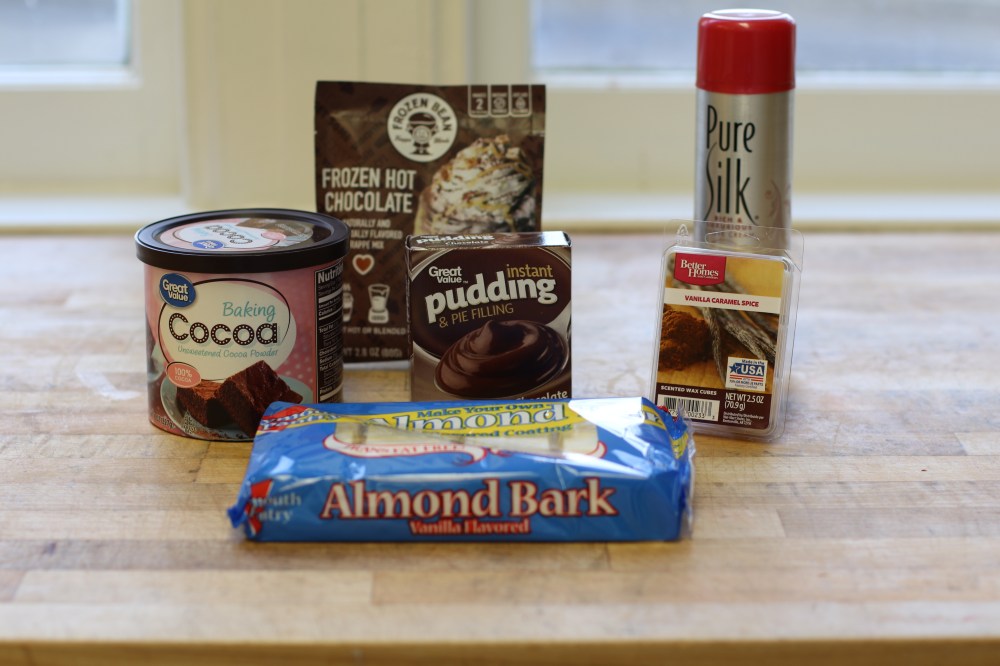
When I arrived at class, I found all of my ingredients plus a few other things I would need that I had not bought:
- Crisco
- Corn Syrup
- Powdered Sugar
- Red Food Coloring
- Piping Bags
- Wilton 1M Piping Tip
- Mason Jars
I also got a bowl to mix in and several pairs of disposable gloves!
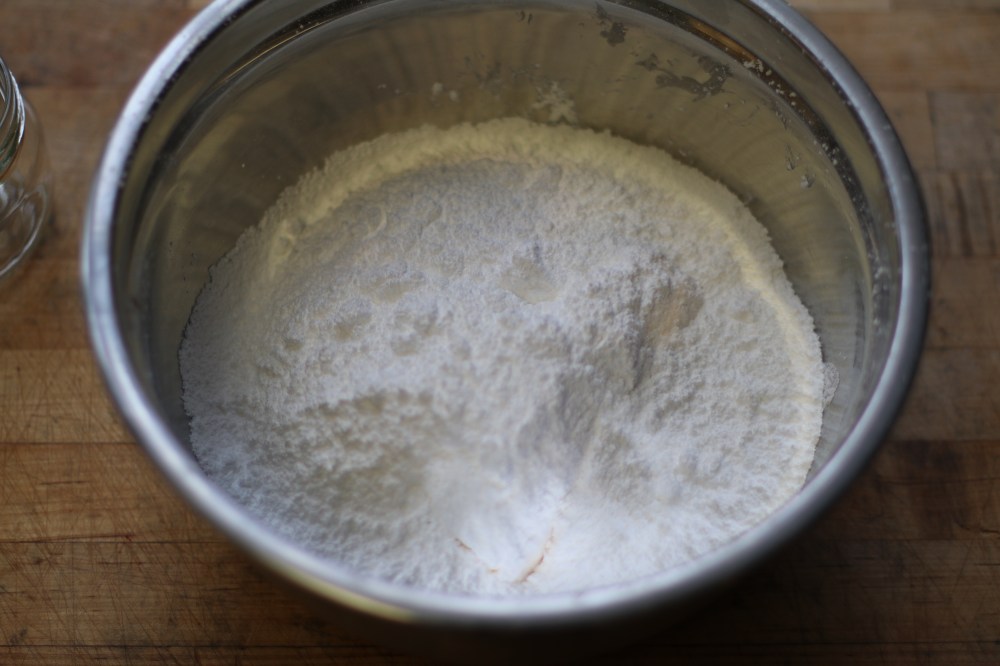
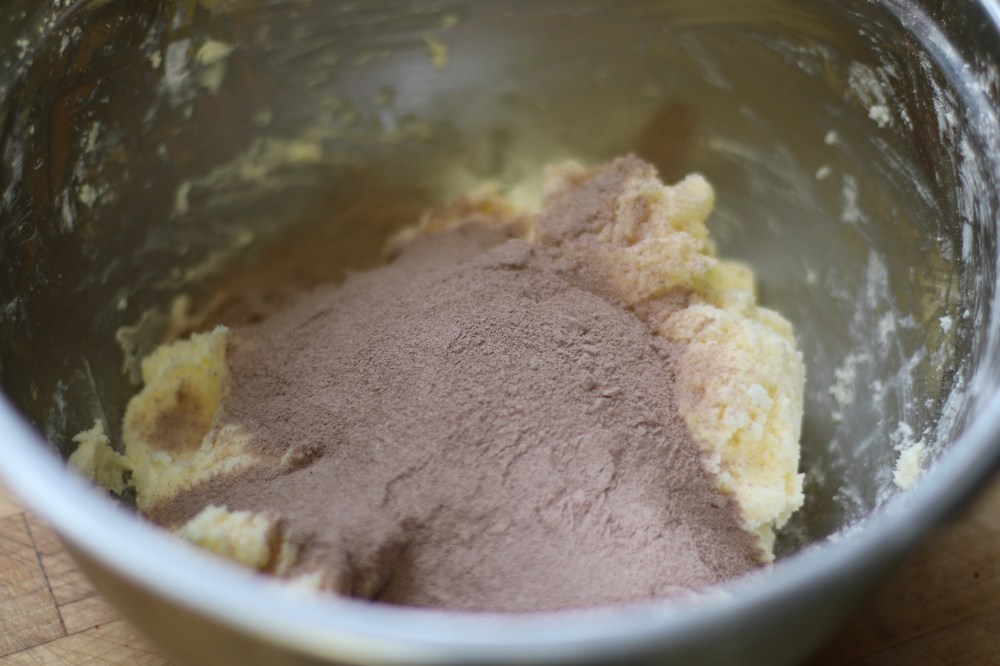
The first thing I did was add about a cup and a half of Crisco to my mixing bowl. (Part of the Crisco is “butter flavored” which is why it is a yellowish color.)

Then I sifted about a pound and a half of powdered sugar on top of my Crisco.
Next, I added about 1/4 cup of corn syrup and using a disposable glove, I mixed it all together with my hand until it was a smooth, off white mass.
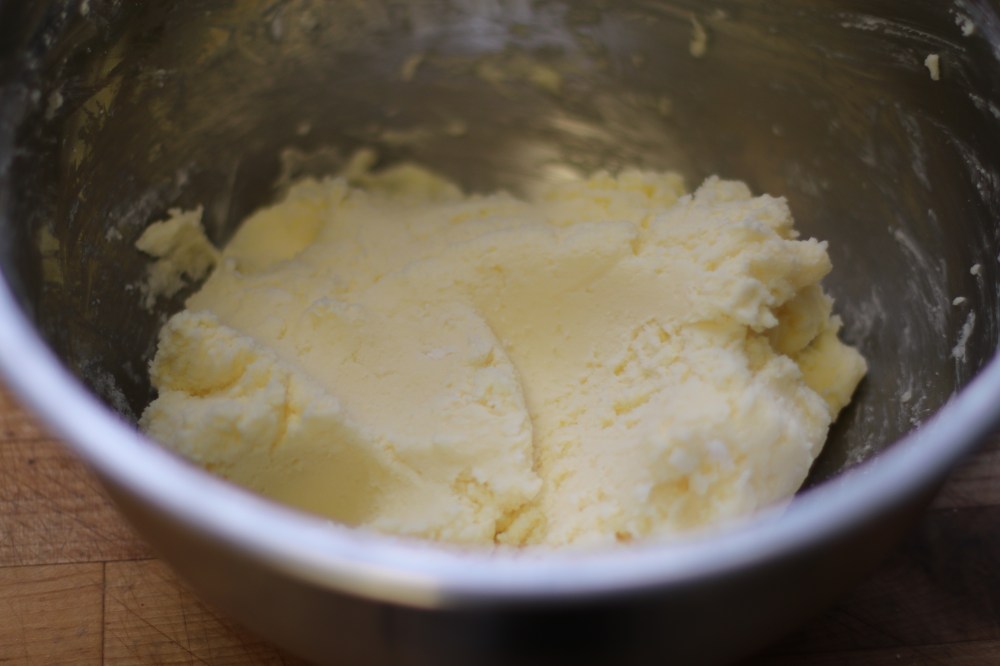
I then mixed in the full packet of hot chocolate mix; however, it was very obvious that this one packet would not make the color that I wanted to match the product on the package.
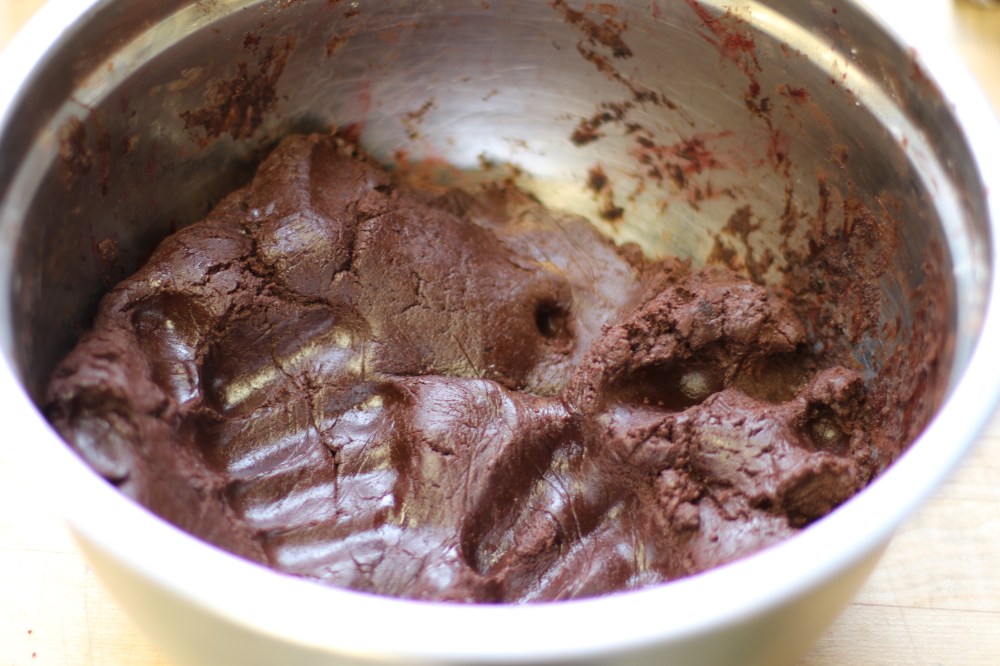
 I quickly grabbed my pudding mix and cocoa powder and went to work adding handfuls at a time until my entire mixture had become a darker shade of brown. I had to continue adding corn syrup as well to keep my mixture from becoming too stiff and hard.
 I then added a little bit of red food coloring to tint my “hot chocolate” to the same shade as the one on the package.
My resulting colored mixture was pretty accurate!
I began filling my half pint mason jars at this point; however, my first few attempts were unsatisfactory. My mixture was too stiff and kept leaving obvious cracks and air bubbles that were visible from the outside of the jar. The mixture definitely did not look like the smooth hot chocolate that it was supposed to be…
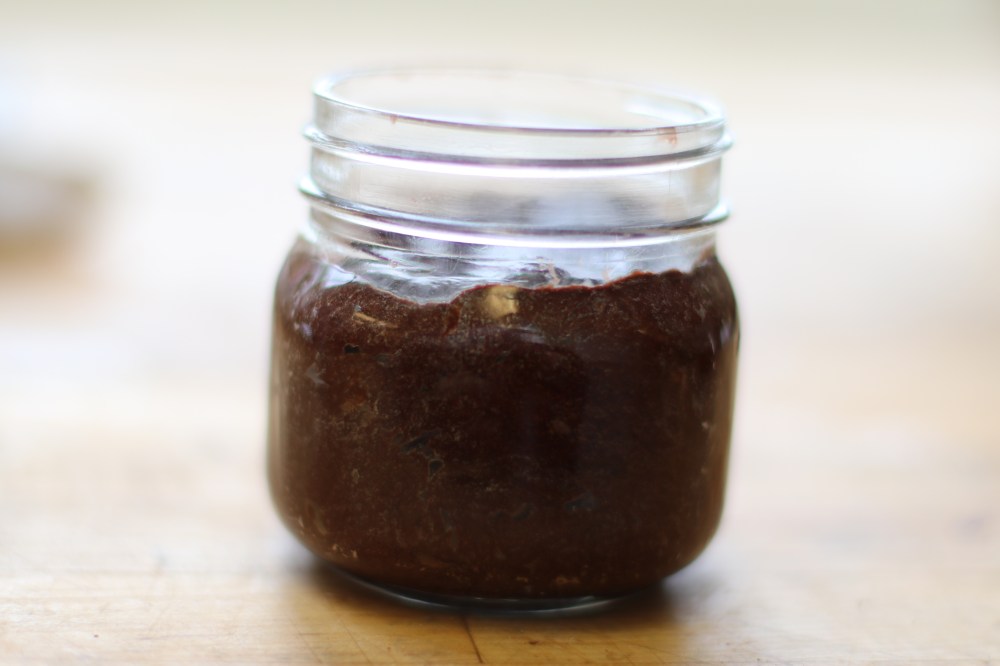
I decided to add more corn syrup and try again. This time, the result was better BUT there were still too many air bubbles for me to be completely happy.
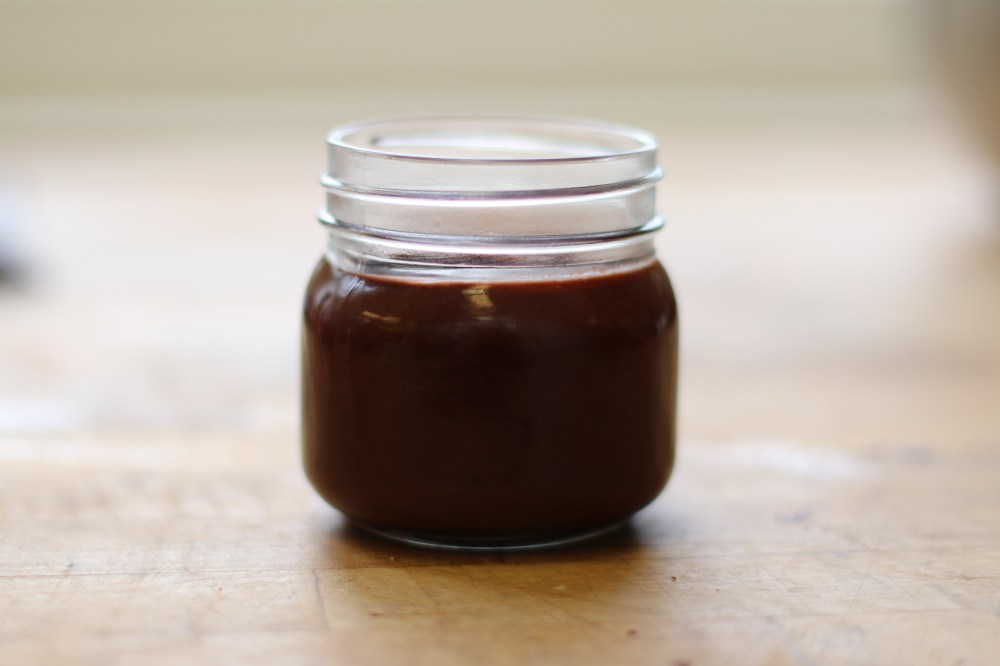
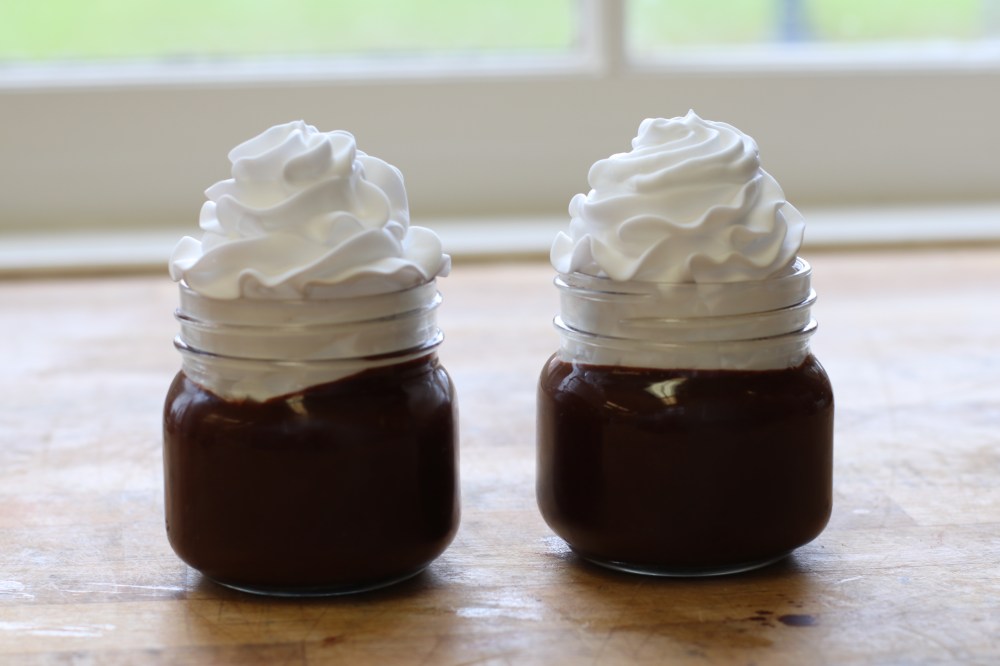
So I took the remaining “hot chocolate mixture” and added a fair bit of water to it. It was now pour-able. I poured it right into the remaining two mason jars, and it was PERFECT. I had a couple air bubbles that I popped with a long toothpick and then my mixture really did look like a smooth chocolate drink instead of a stiff Crisco mass with air bubbles… YUCK.
I then cleaned up the sides of my mason jars because I had made a terrific mess of everything.
I put my 1M piping tip into a piping bag and squirted in some shaving cream. This seemed weird – especially to everyone watching me. It was even weirder that the shaving cream was cherry scented, but at least my area of the kitchen smelled “clean”.
I was extremely hesitant about the shaving cream at first. It felt way to light and soft to possibly hold its shape. But somehow it worked. Really worked. I piped some and about two hours later it was still looking the same exact way.
I easily worked it into a mound of pretend whipped cream.
Only after I had perfected my shaving cream did I realize that the photograph had cocoa powder in the whipped cream that was inside the rim of the mason jar. Of course. SO I had to scrape off all of my shaving cream and then mix some up with a little extra cocoa powder and place the cocoa shaving cream into the remainder of the mason jar.
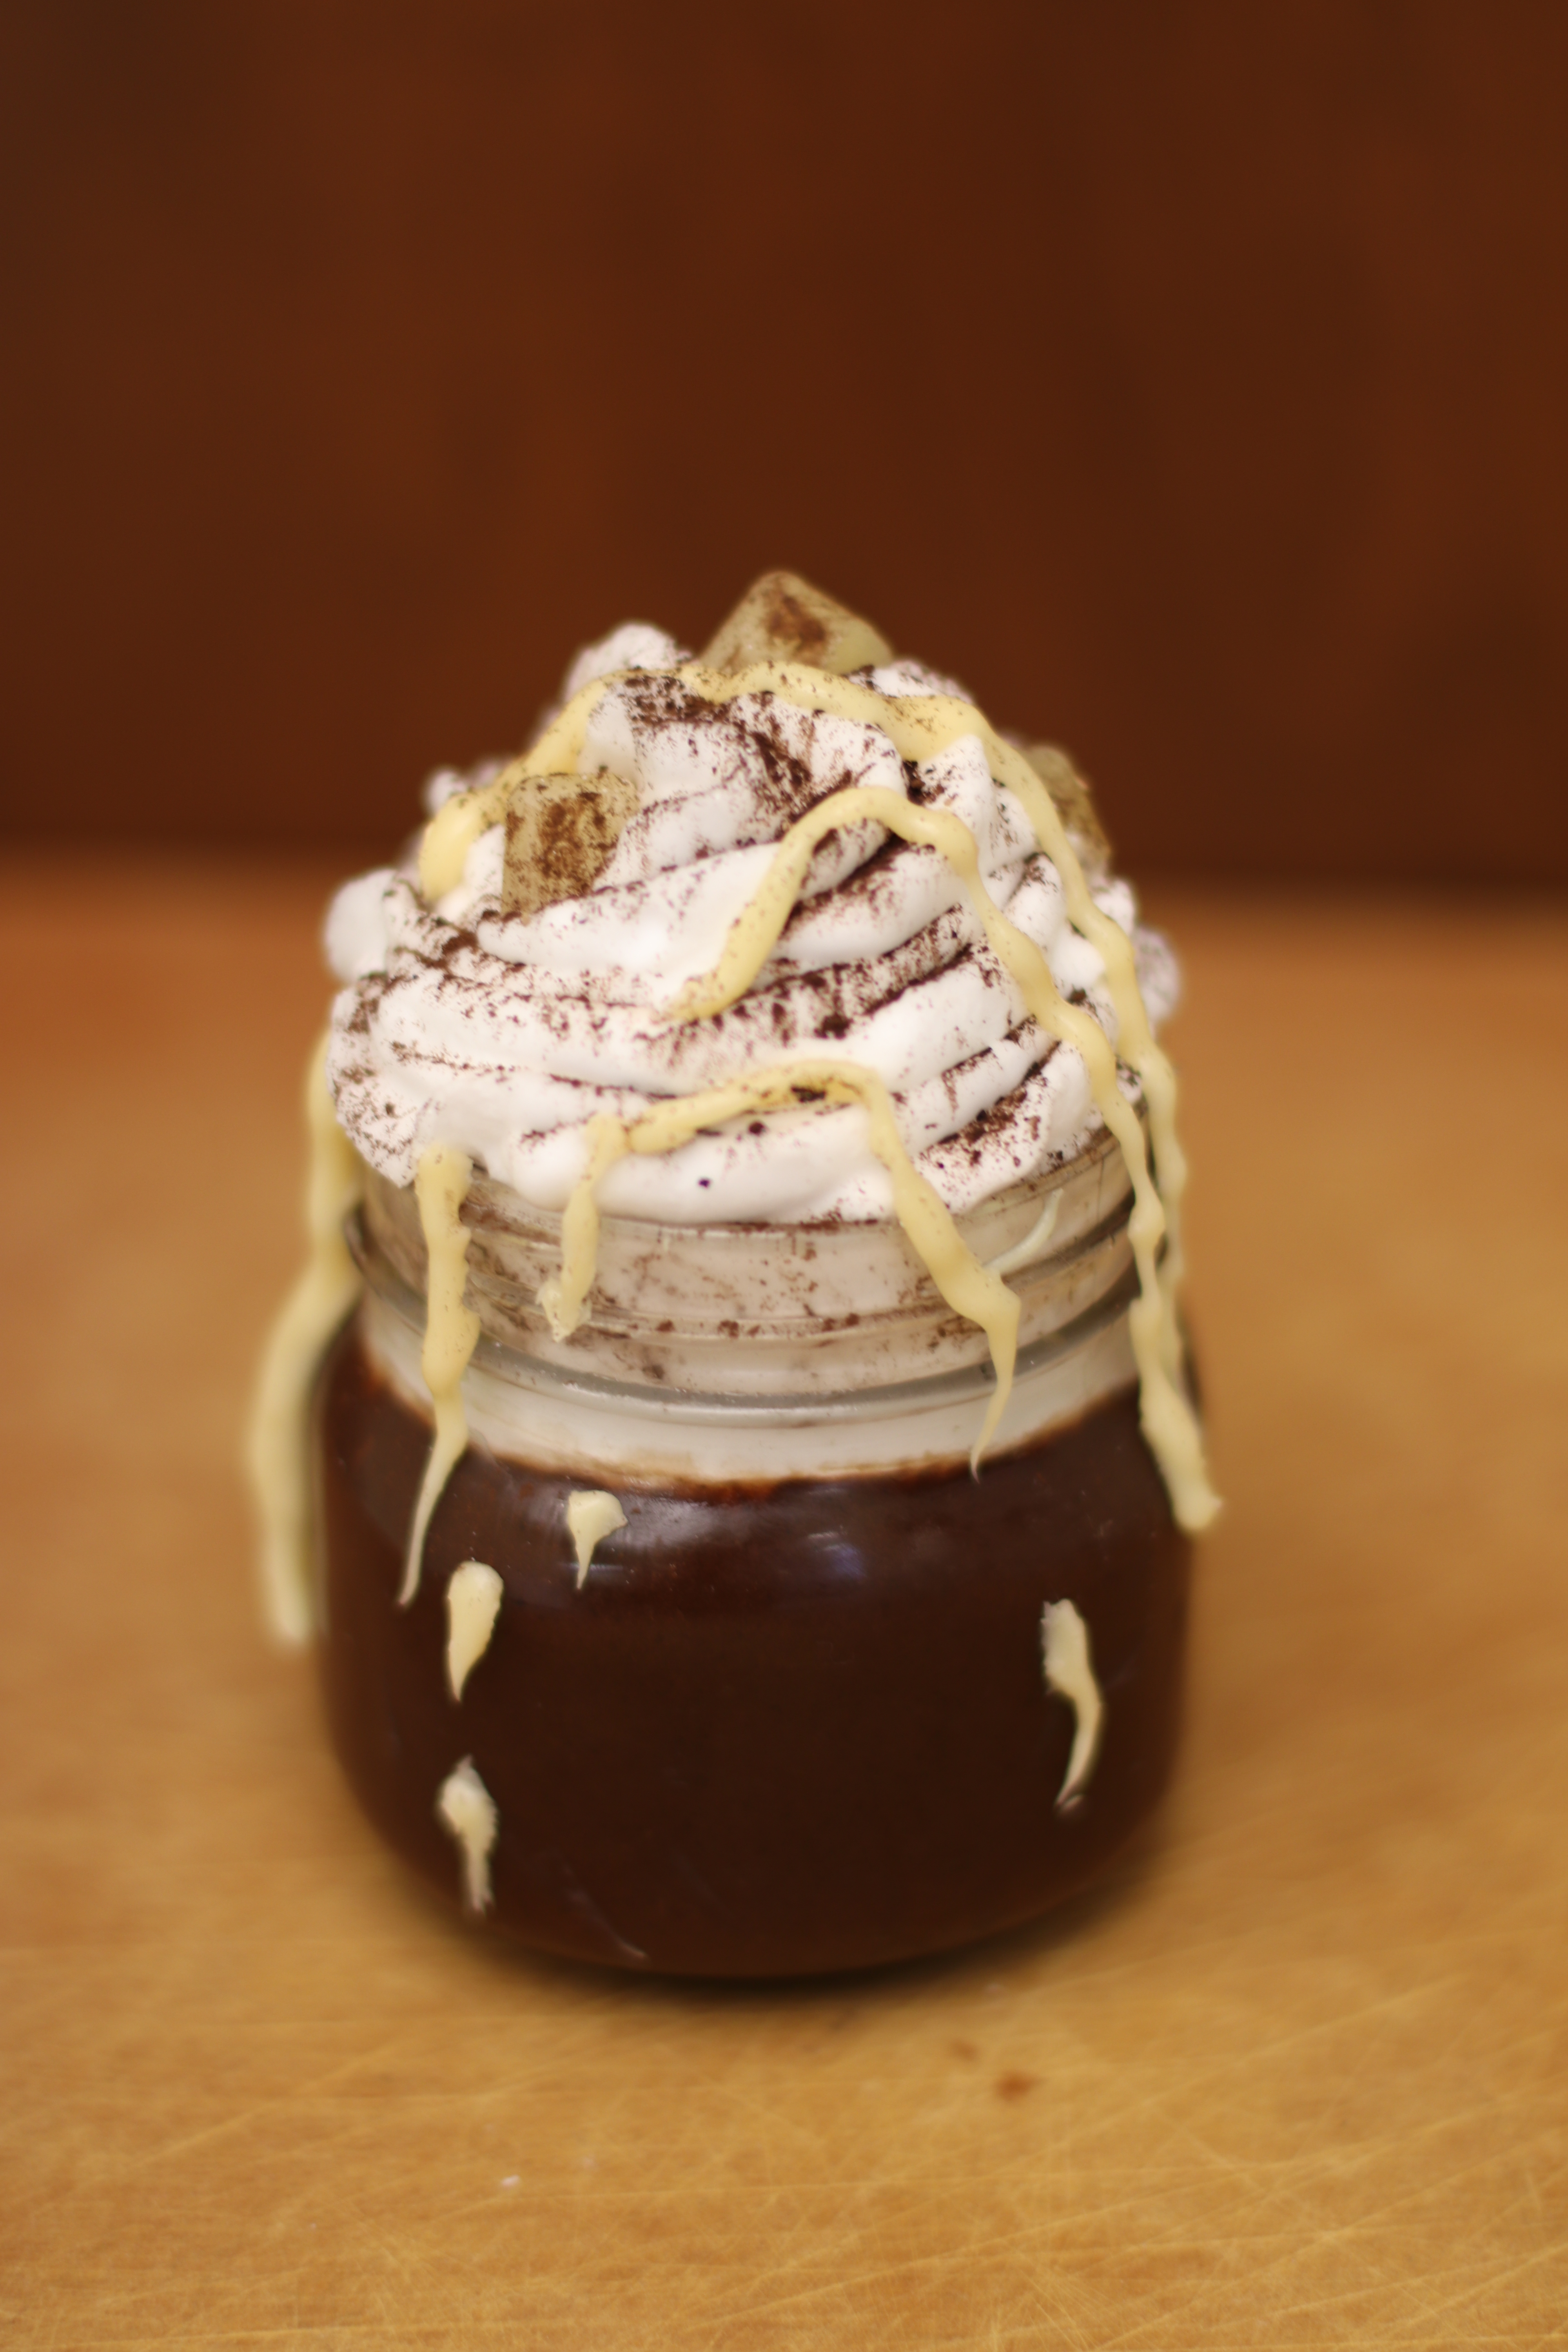
Once the mason jar was full to the brim, I then piped on the mound of shaving cream.
Next I sprinkled it fairly heavily with cocoa powder in a sifter.
At this point, I pulled out my wax and cut up a little of it into small wax cubes to replicate the chunks of caramel or white chocolate in the picture (we could honestly never really figure out what those chunks were supposed to be). I added these to my product and then melted some of the wax in a piping bag and drizzled it over my whole product. This part made the entire kitchen smell like vanilla – which everyone proceeded to comment on for the next hour!
This was the entire outcome:
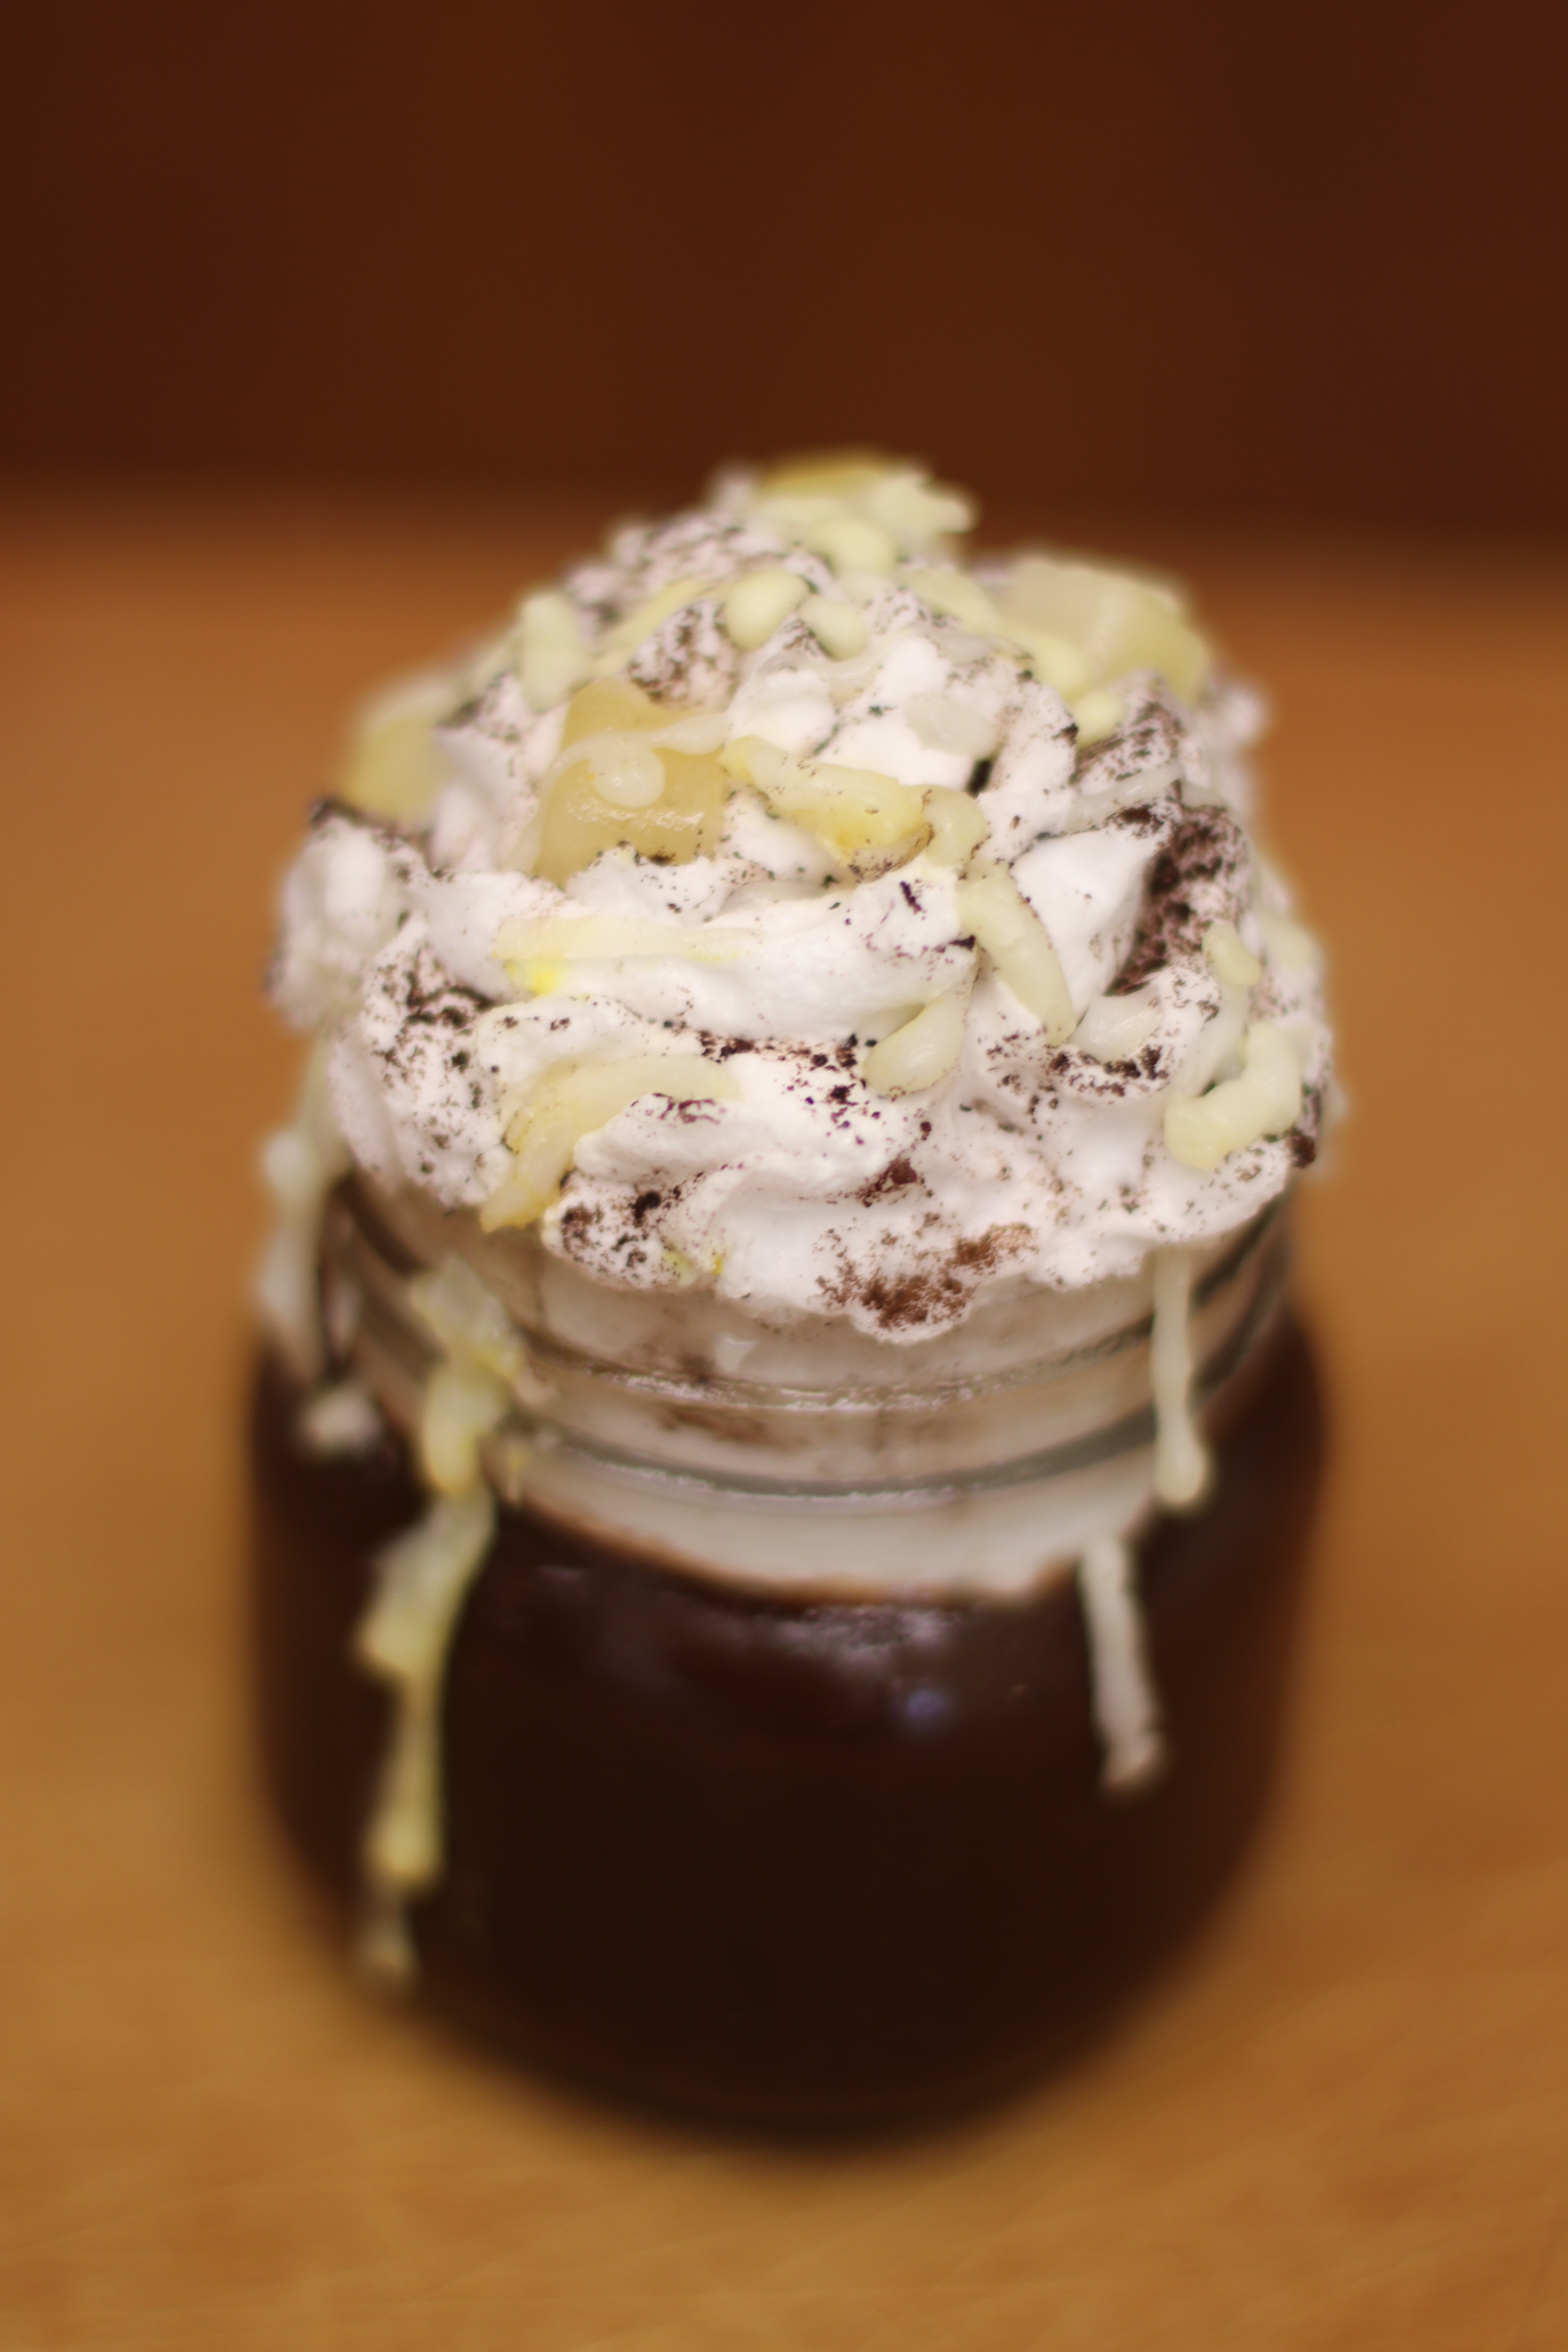
The only problem, really, was the color of the sauce. It was a little too pale to perfectly replicate the product on the container.
I think this is because wax changes colors a little after it is melted and then cools off again. PLUS, the wax hardened up almost as soon as it came out of the microwave so this made it very hard to pipe. The wax became so firm that it would stop sticking to the jar and fall off or it would crumble and look dry and crackly.
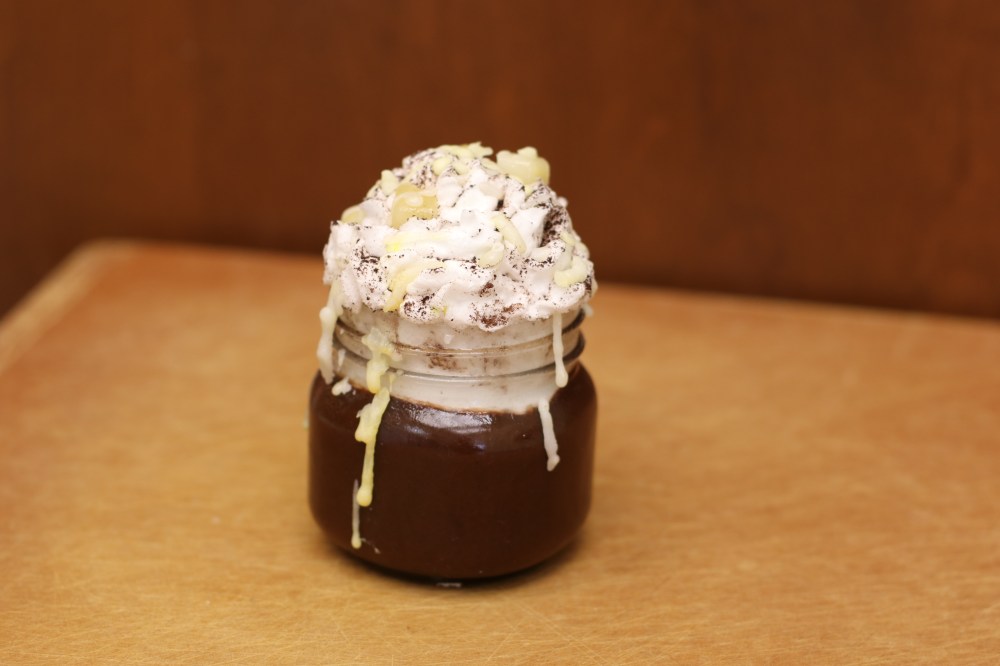
It also lost every bit of sheen once it hardened. There were a million problems with the wax, but regardless, it was not good enough.
SO, I scraped off all of the shaving cream and drizzles and started over once again.
I repiped my shaving cream, resprinkled my cocoa powder, and readded my chocolate/caramel chunks.
Then I melted a little bit of the wax with some white chocolate chips and heavy cream to make a sauce concoction that was easier to pipe and didn’t harden up instantaneously but DID hold its shape and firm up just enough.
Once I had my mixture, I added a tiny bit of yellow food coloring and an even tinier bit of brown food coloring to give it more of a caramel color.
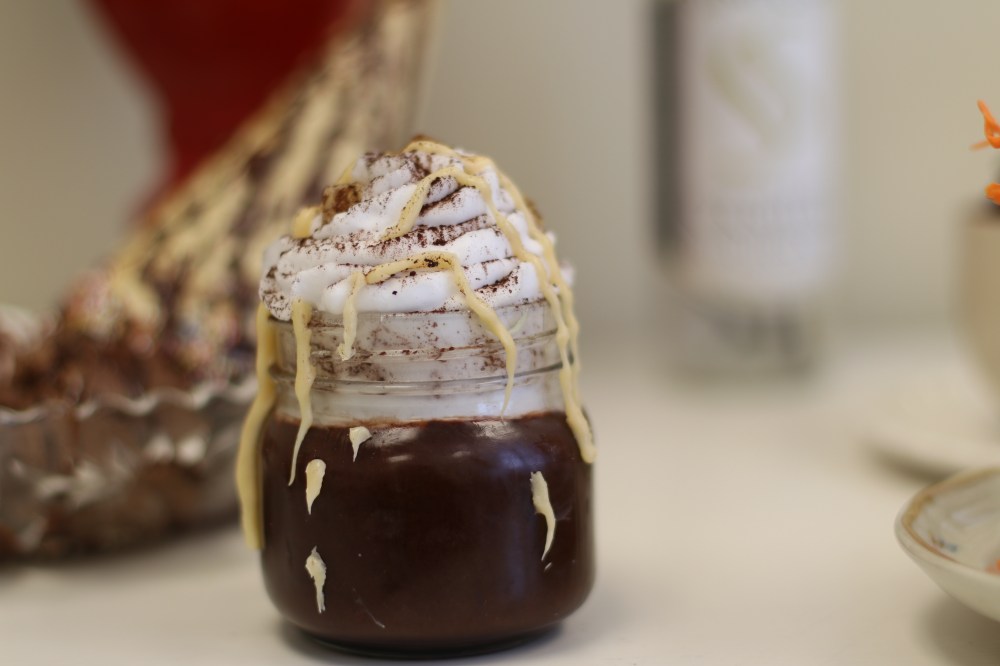
I threw my new and improved mixture into a piping bag and drizzled away. This “sauce” was much easier to deal with.
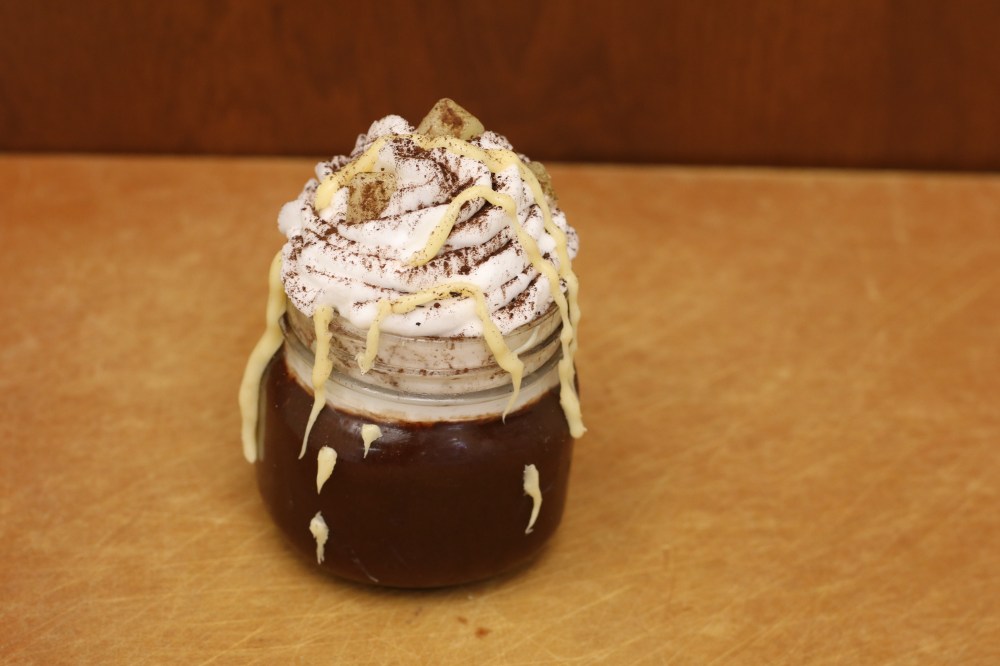
It piped on easily, stuck to the shaving cream and the jar, and looked more like the photo. I am much more pleased with this product!
Here is a side by side comparison of my finished product with the product on the package:
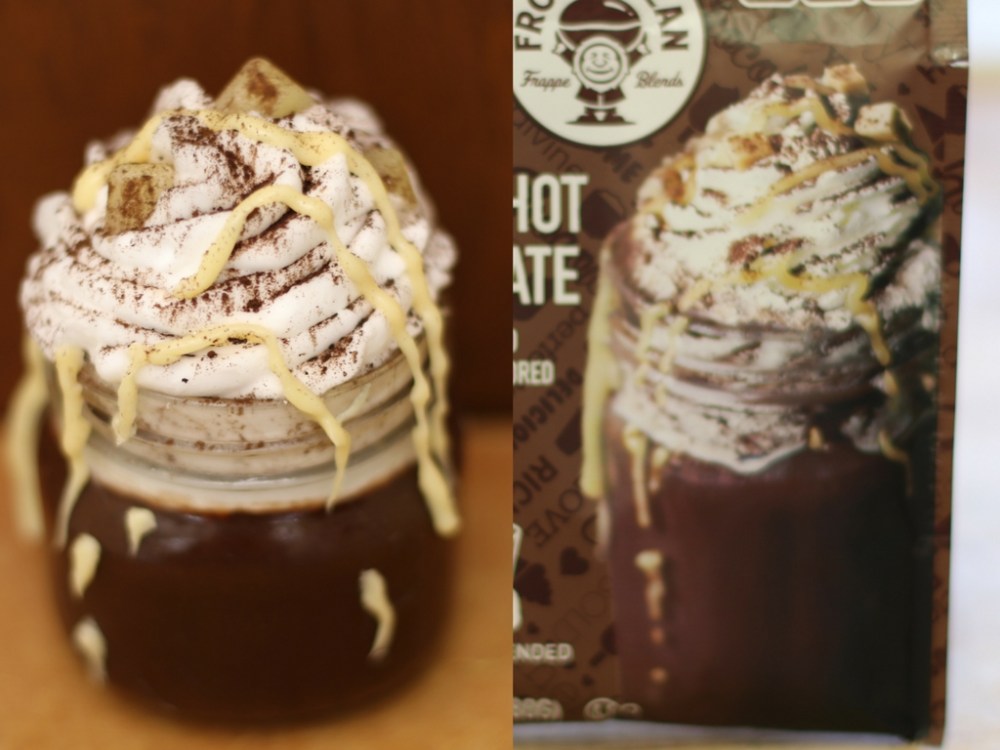
All in all, this midterm involved Plans A,B, C, D, E, F, and G to finally attain a product that I was happy with, but I do think that my finished “hot chocolate drink” does look a lot like the original image and would make an appealing product label!
I wish that my classmates had all kept their finished products so that I could have taken photos, but everyone else trashed theirs as soon as Chef MH had had a chance to look at them.
I am proud of my finished product, especially because I’ve had such limited experience with food styling and using inedible ingredients while trying to make them look delicious and edible!
Today was a very interesting day in the kitchen full of trials and errors (quite a few). And although I love this class and the subject matter very much, I am sooo ready for spring break next week! What about you?
